Time for a great new free project! With the Rio Olympics in full swing right now i thought, “What a perfect time to make a beaded bracelet to show your national pride!”. So I sat down, made a design, beaded it up and here it is for you all! Hope you like it! 🙂
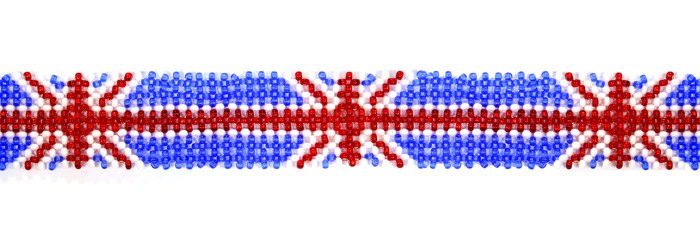
So here’s the standard base pattern I have designed of the Union Jack. It looks great in size 10 Seed Beads, giving you a cuff a little under an inch wide, making it nice and clear but not too bulky. This pattern can be repeated as few or as many times as you like and is easily spaced out by repeating the rows with only a red stripe in the middle.
https://www.beadspider.co.uk/wp-content/uploads/2016/08/Great-British-Bracelet.pdf
https://www.beadspider.co.uk/wp-content/uploads/2016/08/Great-British-Bracelet.pdf
Getting Started
STEP 1
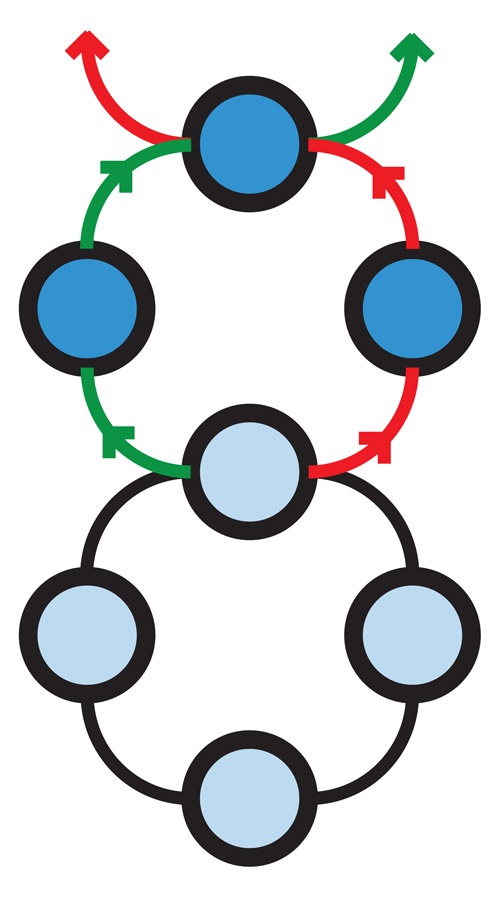
Cut a piece of thread approximately 1.5m in length and thread a needle onto both ends. Following along to your pattern, thread on your first 3 beads to the centre of your thread. It’s easiest if you start with a few rows of spacing pattern, meaning all your first three beads will be blue.
NOTE: If you prefer a stiffer finished bracelet, try using a very fine monofilament that will easily fit through your seed beads multiple times.
STEP 2
Taking the next bead in your pattern (if doing a few rows of side strap section first, this will also be a blue bead) – take your needle through the bead but in opposite directions.
STEP 3
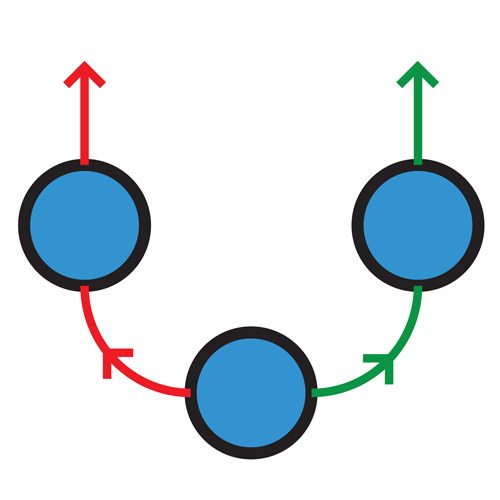
Again, following the pattern, thread a bead onto each side of your bead weaving thread. Take one more bead and to create your next right angle weave (from now on i will refer to them as a “RAW”), pass each needle through it in opposite directions and pull it tightly until it locks in place.
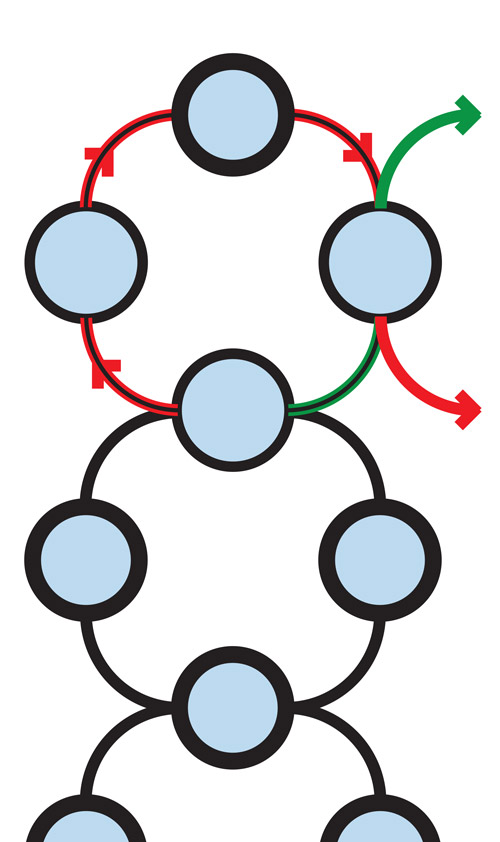
Continue this process of taking a bead onto each side of your thread and then weaving in opposite directions through another bead, creating tight right angle weaves all the way until you reach one RAW before the opposite side of your bracelet.
STEP 4
To create the final RAW of the row to complete it and step up to the next row, thread 3 beads onto your left thread.
Take your right thread in the opposite direction through the last bead threaded and pull tightly to secure it.
Your thread should be coming out of the final side bead.
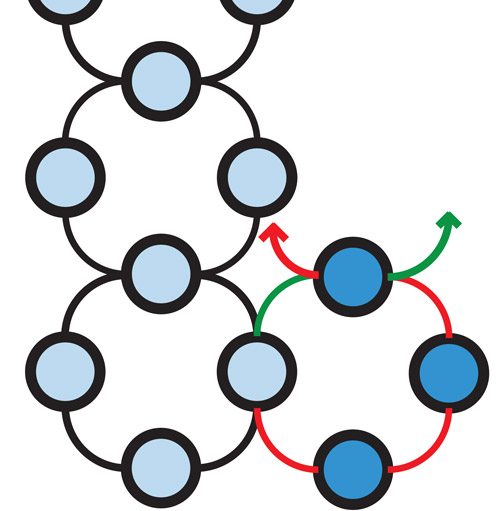
STEP 5
The very first thing to note here is that i have flipped my work over. You don’t have to do this but i find it easier to work away from myself rather than towards (hence why the diagram is now weaving upwards again).
Taking the needle that is closest to the bottom, thread on 3 of your beads according to the pattern.
Just as before, we are going to take the other needle through the last bead threaded but in the opposite direction. When you pull this tight it will make another nice little RAW.
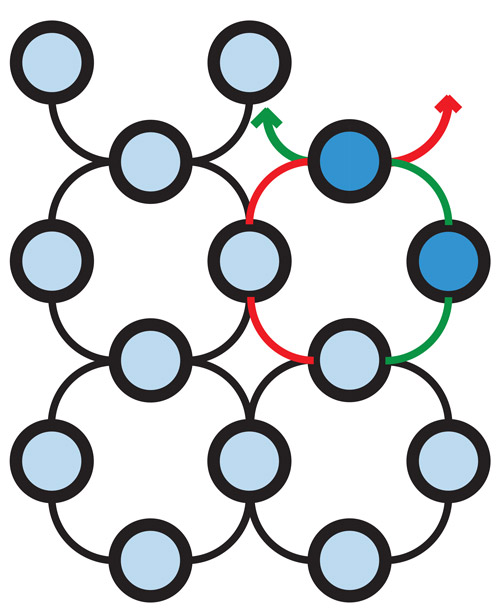
STEP 6
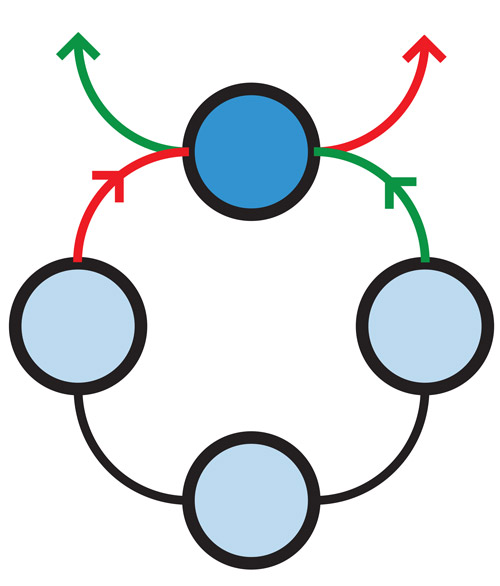
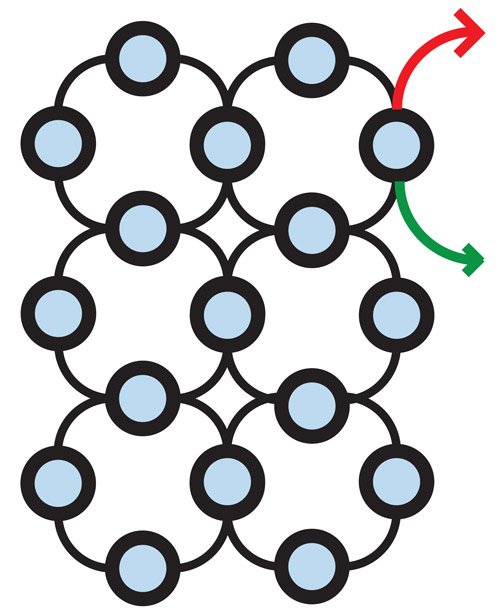
The first thing we do in this step is take our left needle (Red thread in the diagram) through the side bead above, this is going to be the left bead of your RAW.
With your right thread (Green in the diagram) thread on 2 beads in accordance to your pattern and take your left thread in the opposite direction through the last bead you threaded.
Repeat Steps 5 and 6 until you are one RAW from the end.
STEP 7
To complete this row and step up to the next, on your final RAW take your left thread through the final edge bead, add the next 2 beads in your pattern to this thread and then take your right thread through the final beaded added so that your threads are coming out of the side.
Flip your work over again and repeat from step 5 to do your next row.
Continue in this way, following your pattern, until you have your desired length of bracelet. If you have a small wrist do fewer rows of the strap pattern between each union jack feature (maybe 5 – 6 if you want to do 3 union jacks). For a larger wrist maybe do 10 – 11 rows between each union jack.
Feel free to get creative and alter how many or few union jacks to personalise your bracelet to just the way you like but personally i like 3.
To finish your bracelet off, you can make it a bangle by bringing your two ends together and weaving them together into a single closed bracelet. Make sure you make your bracelet big enough for you to fit it over your hand though else you wont be able to get it on and off!
Alternatively, weave your ends onto the separate sides of a 3 strand magnetic clasp. This way you can get it on and off really easily!